Create In-app Notifications using Microsoft Power Automate


Challenging Traditional Approaches to Proximity Marketing
Proximity marketing could be the key to delivering the right offer to the right customer at the right time — and solutions providers are discovering innovative ways to improve proximity marketing accuracy every day.
Read the BlogIn-app notifications for model-driven apps is a newly-released feature by Microsoft. It allows us to configure various notifications that pop out for users in the model-driven app notification center.
Enabling In-app Notifications in Model-Driven Apps
This is a preview feature and isn’t available in all regions. System administrators need to enable early access to use the in-app notifications capability.
Steps to follow to enable in-app notifications in model-driven apps:
- Get the App Unique Name from the properties tab under App Designer
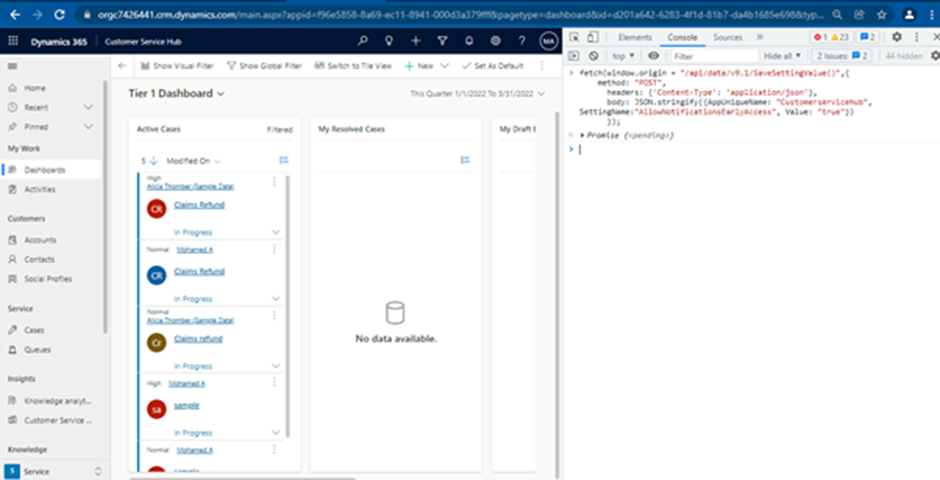
- Open Model-Driven App and launch the browser’s console
- Paste the following script, replace the <App Unique Name> with the unique name of your app
fetch(window.origin + "/api/data/v9.1/SaveSettingValue()",
method: "POST",
headers: {'Content-Type':"application/json'},
body: JOSN.stringify{AppUniqueName:<App Unique Name>,
SettingName:"AllowNotificationsEarlyAccess", Value:"true"})
});
4. Go to the Solutions and select ‘Publish All Customizations
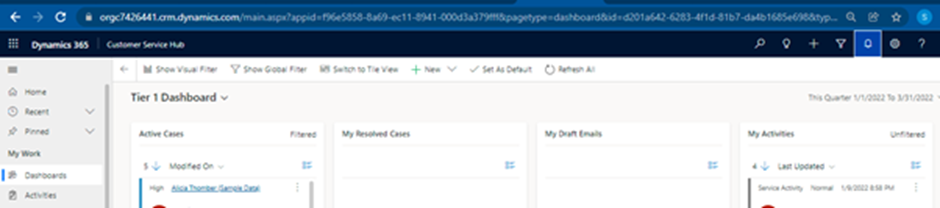
5. In-app notification feature is now enabled, as a result, Notification Toast will be shown in the model-driven app
Create Notifications through Power Automate Flow
Power Automate is a service that helps to create automated workflows. You can use it to automate the creation of notification records whenever it meets specific conditions.
For example, create notifications for the user whenever a high-priority case is created. Here are the steps to follow:
- Sign in to the Power Automate flow
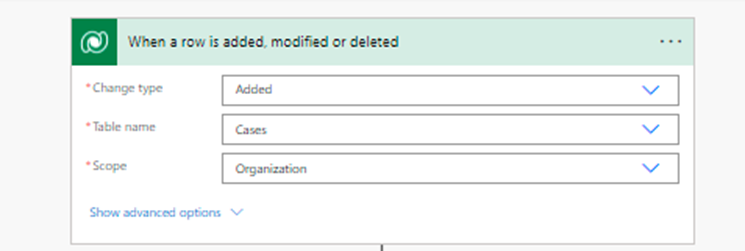
- Create a cloud flow with a trigger when a row is added, modified, or deleted
- Change Type: Added
- Table name: Cases
- Scope: Organization
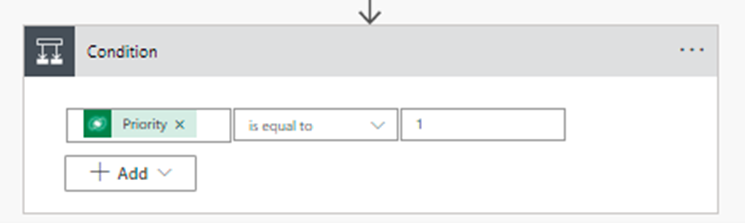
3. Add the condition “Action”, and check whether the case is high priority
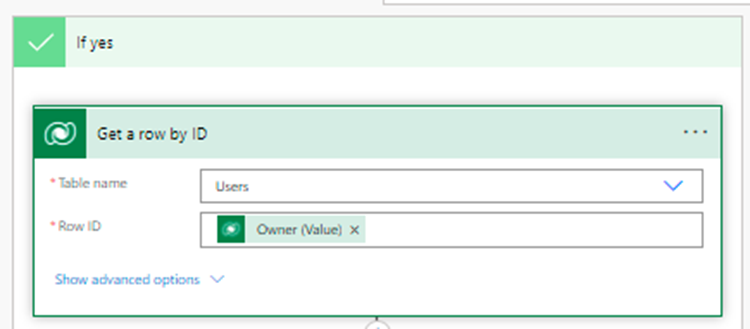
4. If the condition is satisfied, then add the Action Get a row by ID to get the user details
- Table name: Users
- Row ID: Owner of the case GUID
5. Add Parse JSON action to generate a link to navigate to a specific record from the notification
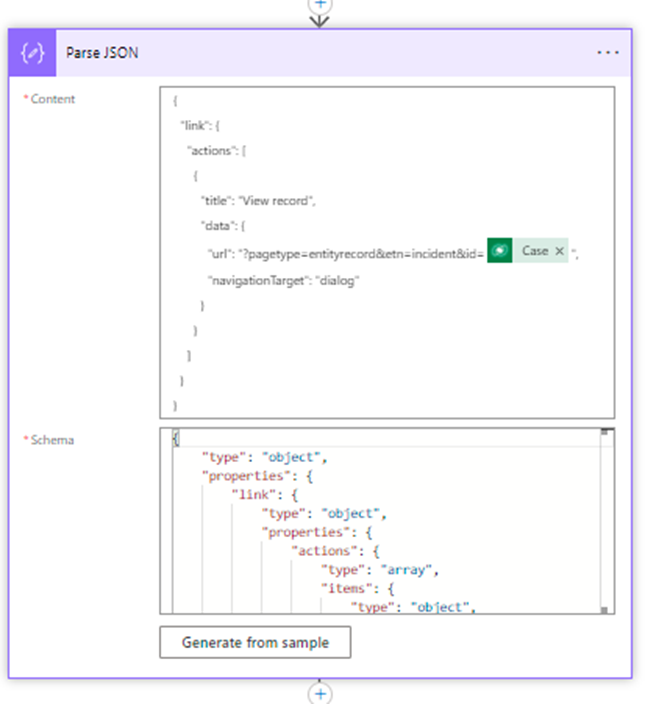
In Content, paste the following JSON. Replace the <entityLogicalName> with the entity name and <recordId> with the GUID of the specific record for which the link needs to be generated.
{
"link":{
"actions":[
             {
"title": "View recprd",
"data":{
"url": ?pagetype=entityrecord&etn=<entityLogicalName>&id=<=recordId>",
"navigationTarget": "dialog" }
              }
           ]
      }
}
In Schema, click on the Generate from Sample button and add the above-provided JSON in the sample JSON Payload box. The schema will be generated automatically.
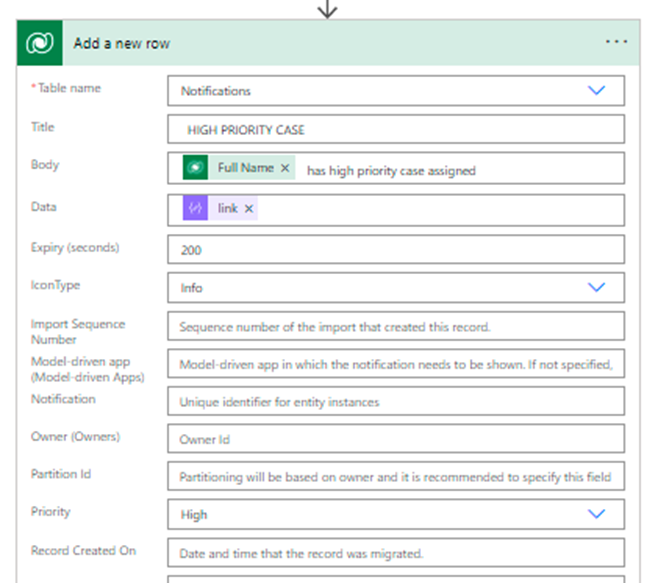
6. Add the ‘Add a new row‘ action to create a notification record and save the flow
- Table name: Notifications
- Title: Provide the title for the notification
- Body: Provide the message to be displayed in the notification
- Date: Select link (output of the parse JSON Action)
This will provide the link — by clicking on the link, the user will be navigated to the specific record
- Expiry (seconds): Provide expiry time for the notification
- Icon Type: Select Info option
- Priority: Provide the priority for the notification
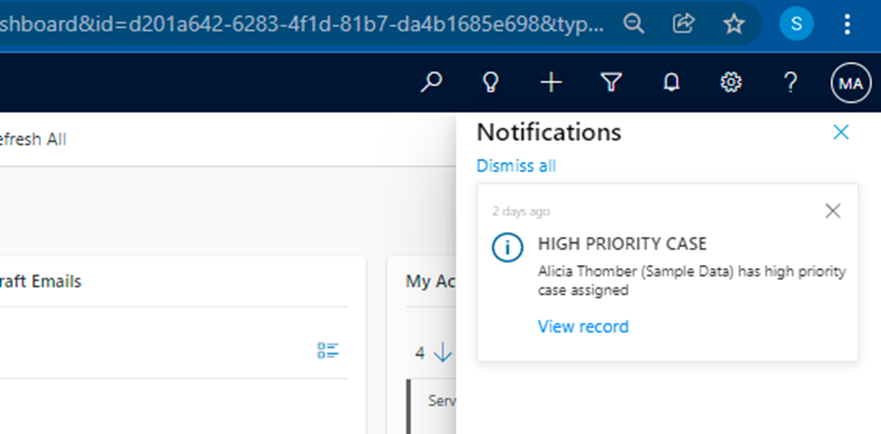
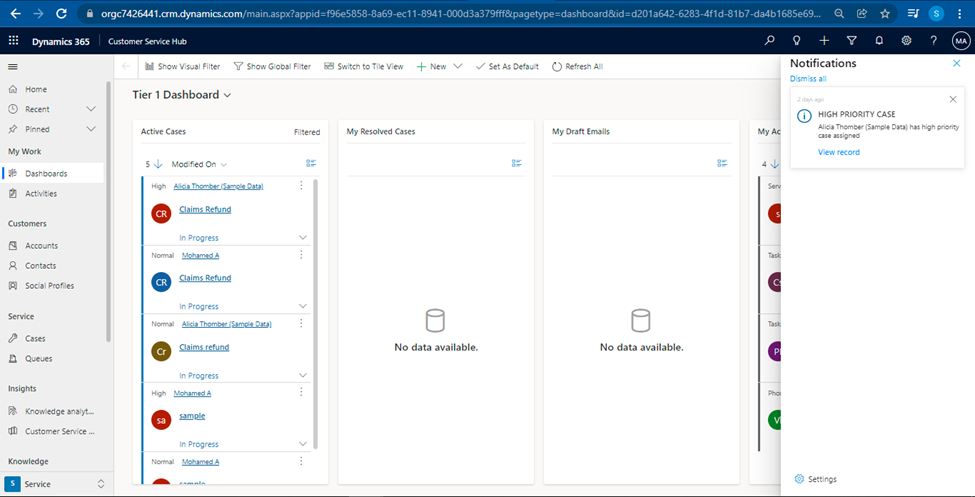
When a high-priority case is created, the user will receive an in-app notification.
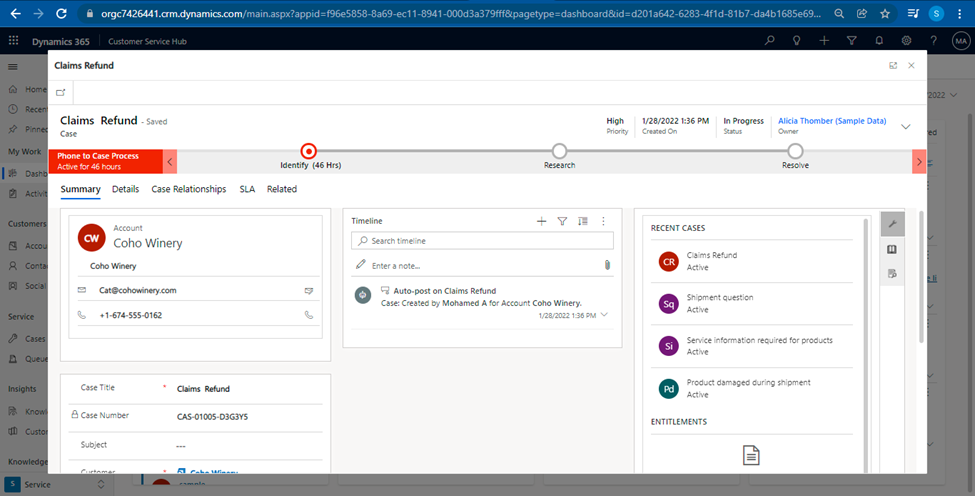
On clicking the ‘view record‘, the user will be navigated to the specific case record.
Conclusion
In this article, I have covered the steps to create in-app notifications through Power Automate. However, please note it is a preview feature that will be GA by April 2022.