Dynamics 365 Cascading Field Values With Many-to-Many Relationship


During several implementations, customers have had requirements to have:
- Fields related to each other where a value chosen in a parent field results in a specific set of values available in a child field.
- Values in the child field can be related to multiple values in the parent field (many-to-many relationship).
- Users be able to maintain the values of the parent field and the related values of the child field without having to go to code or update Option sets.
- No coding needed to set up.
- An upgradable configuration without intervention.
This article goes through an example of how to set cascading fields up and enter data, step by step. In this example, for the Leads entity, a list of Primary Source leads needs to be related to a set of values for Secondary Source leads. This process could be for any existing entity other than Leads, creating any two sets of related values.
Step 1: Create a custom entity for Primary Source by opening the Solution you wish to add this to, click on Entities and hit ‘New’:
Step 2: Enter required information on Primary Source custom entity. Change Ownership to Organization, mark Settings for area to display this entity, and then Save and Close.
Step 3: Create a new 1-to-many relationship from Primary Source entity to associated Lead entity and enter the Related Entity of Lead and enter the Display Name of the Lookup Field ‘Primary Source’. Keep all other defaults.
Step 4: Add the Lead Main form to your Solution. Open the Lead Main form and add the Primary Source field.
Step 5: Repeat process #2 through #4 to create a ‘Secondary Source’ custom entity with a 1-to-many relationship with Leads and add it to the Lead form.
Step 6: Publish All Customizations.
Step 7: Create a many-to-many relationship between Primary Source entity and Secondary Source entity. Enter the ‘Other Entity’ value. Save and Close. Publish change.
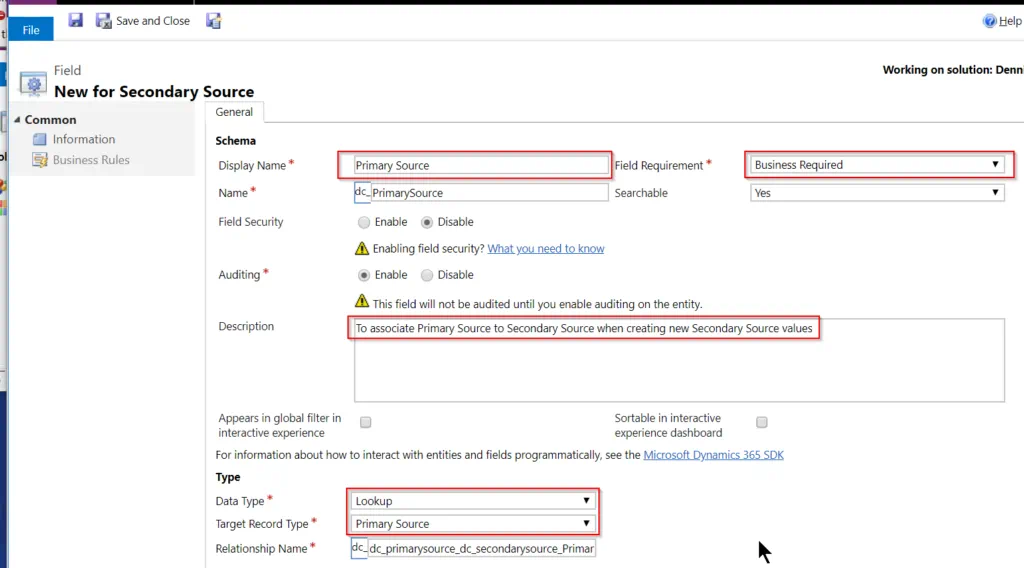
Step 8: Create a field called ‘Primary Source’ in the Secondary Source custom entity that is a lookup to the Primary Source entity. Save and Close. Publish.
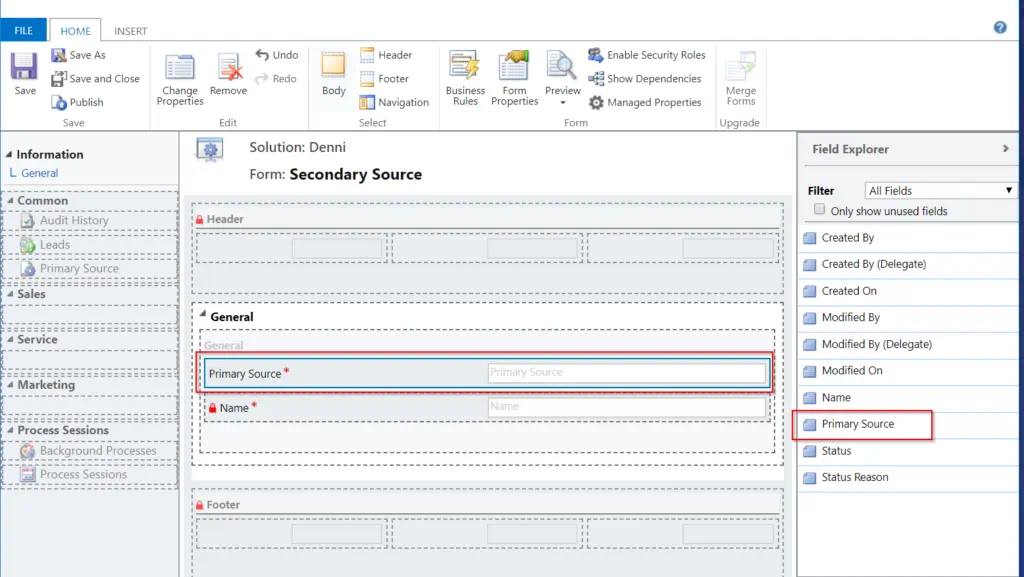
Step 9: Add the field ‘Primary Source’ to the Secondary Source entity main form. Save. Publish. Close.
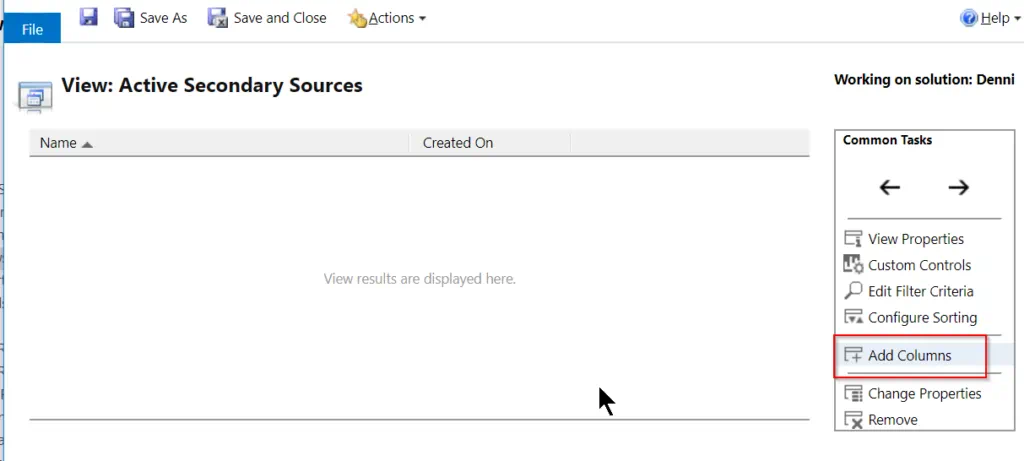
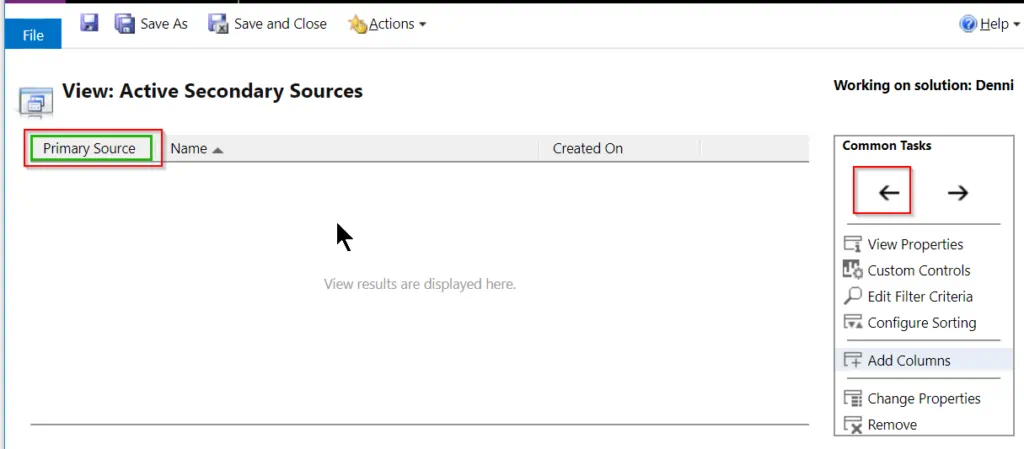
Step 10: Add the Primary Source field to the Secondary Source entity default view. Save and Close. Publish.
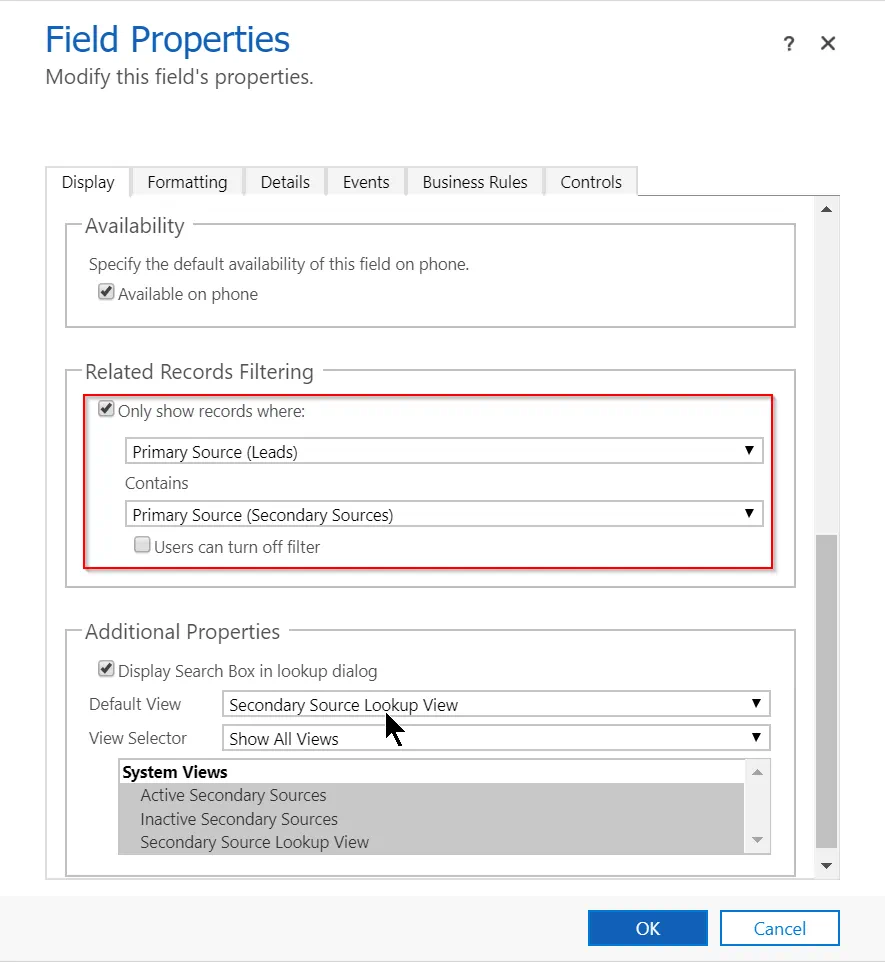
Step 11: Navigate to the Lead Main form and double click on the ‘Secondary Source’ field. In the ‘Record Related Filtering’ section, mark ‘Only show records where:’ and un-mark ‘Users can turn off filter’. Change the defaults to ‘Primary Source (Leads)’ Contains ‘Primary Source (Secondary Sources)’. Click OK. Then Save and Close.
Step 12: Publish All Customizations.
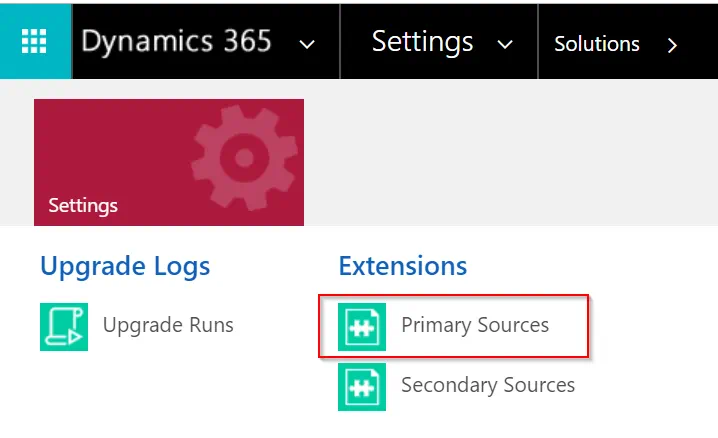
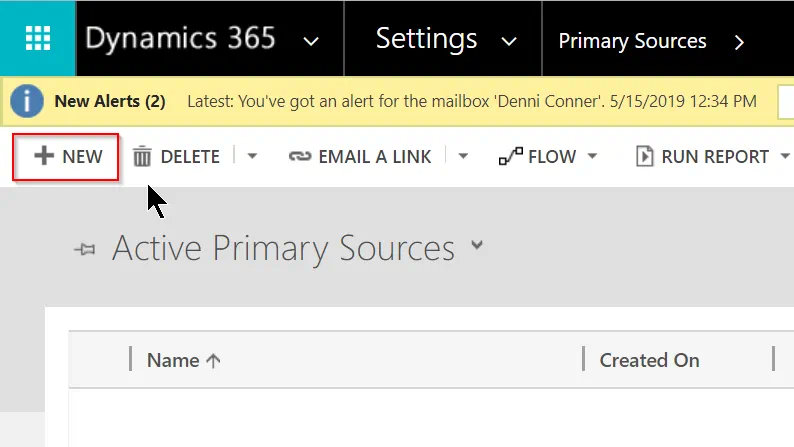
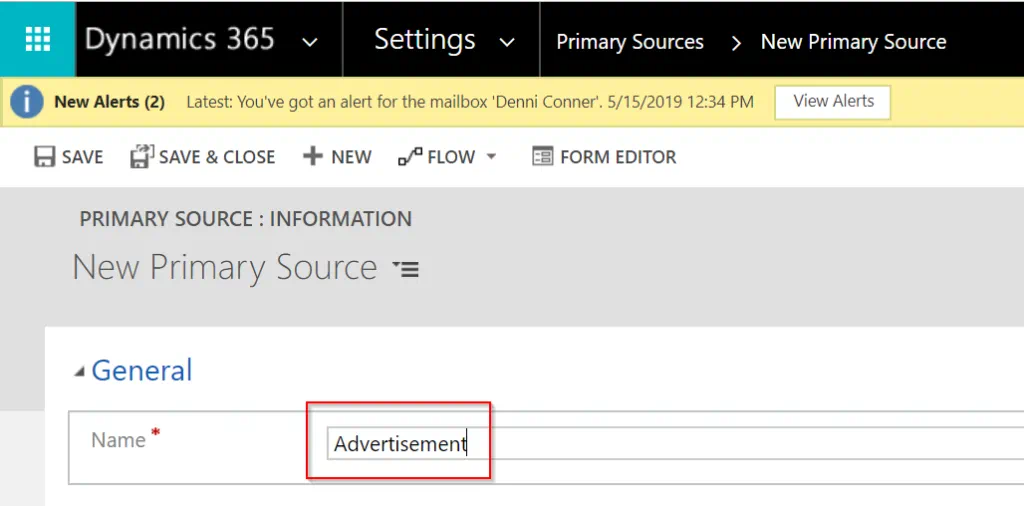
Step 13: Enter values for Primary Sources by going to Settings -> Extensions -> Primary Source.
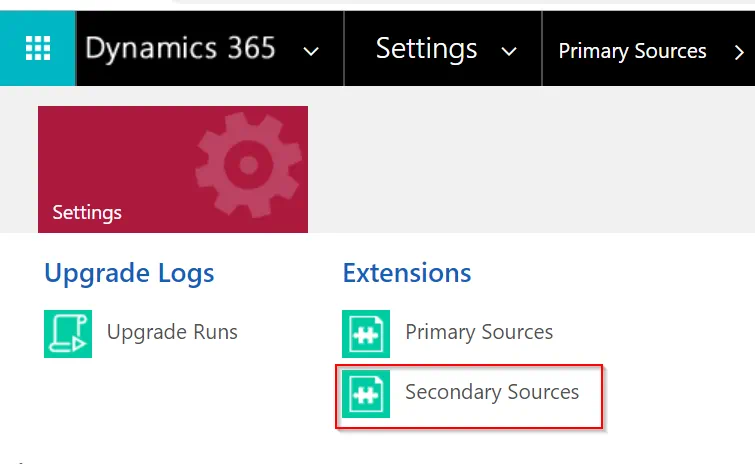
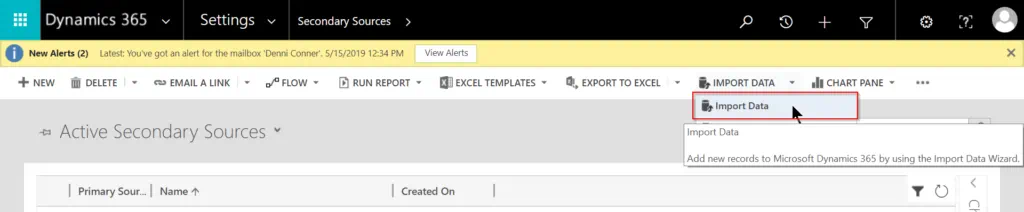
Step 14: Enter values for Secondary Sources by creating a data import sheet, entering values and importing. Go to Settings -> Extensions -> Secondary Sources.

Click the downloaded file at the bottom of the screen to open an Excel file template:
Then enable editing:
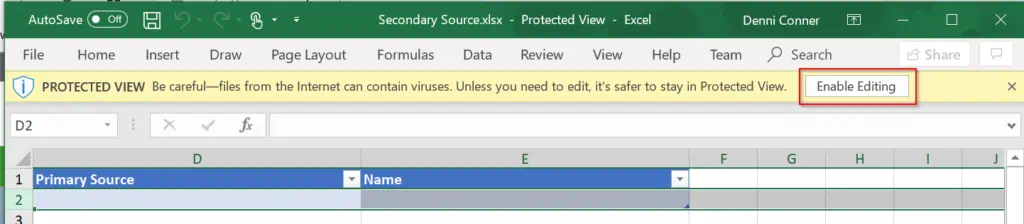
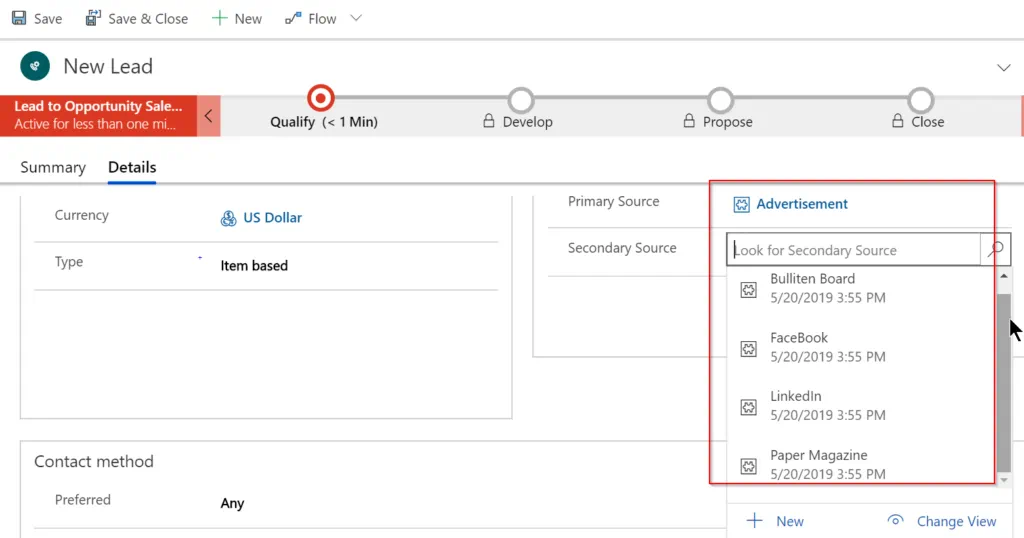
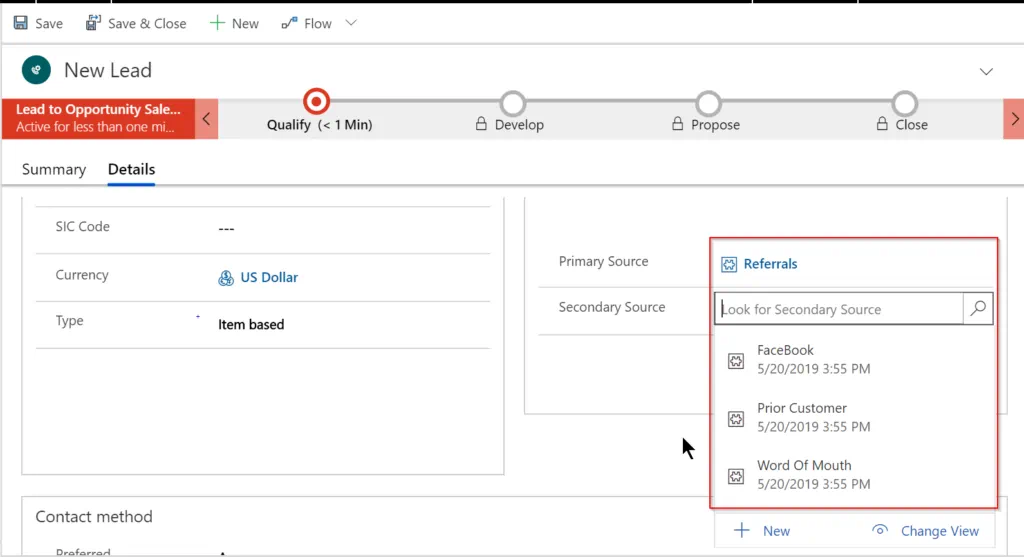
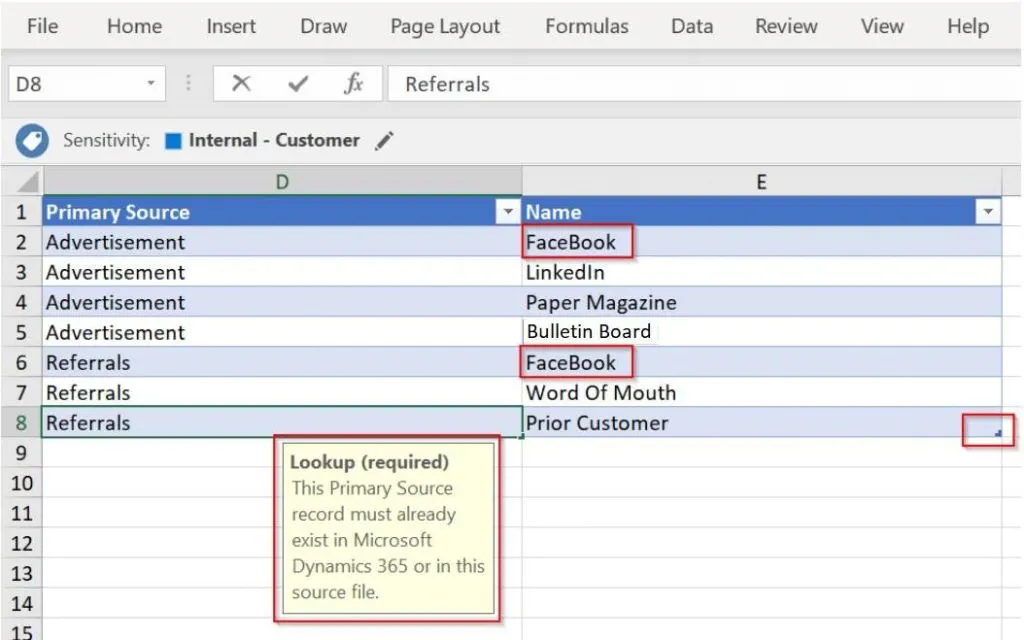
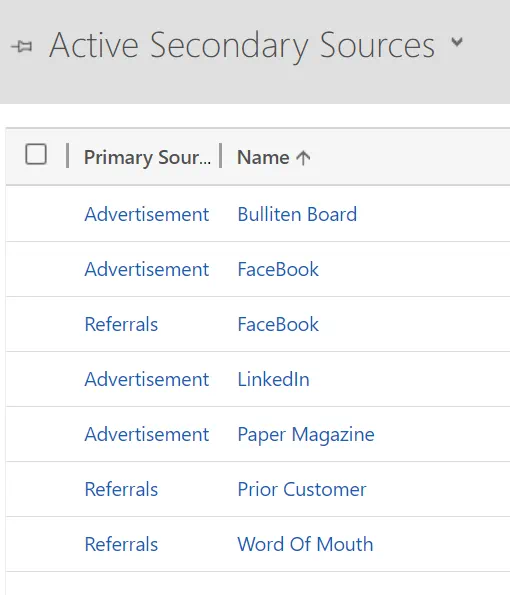
Enter the Primary Source name. This must exist in D365. And then enter a Secondary Source Name under the ‘Name’ column. Note that the rows must always be before the row with a mark in the lower right-hand corner of the cell to get imported. Notice below that FaceBook Secondary Source ‘Name’ value appears with both the Primary Source of ‘Advertisement’ and ‘Referral’. This is why a many-to-many relationship needs to exist between Primary Source entity and the Secondary Source entity.
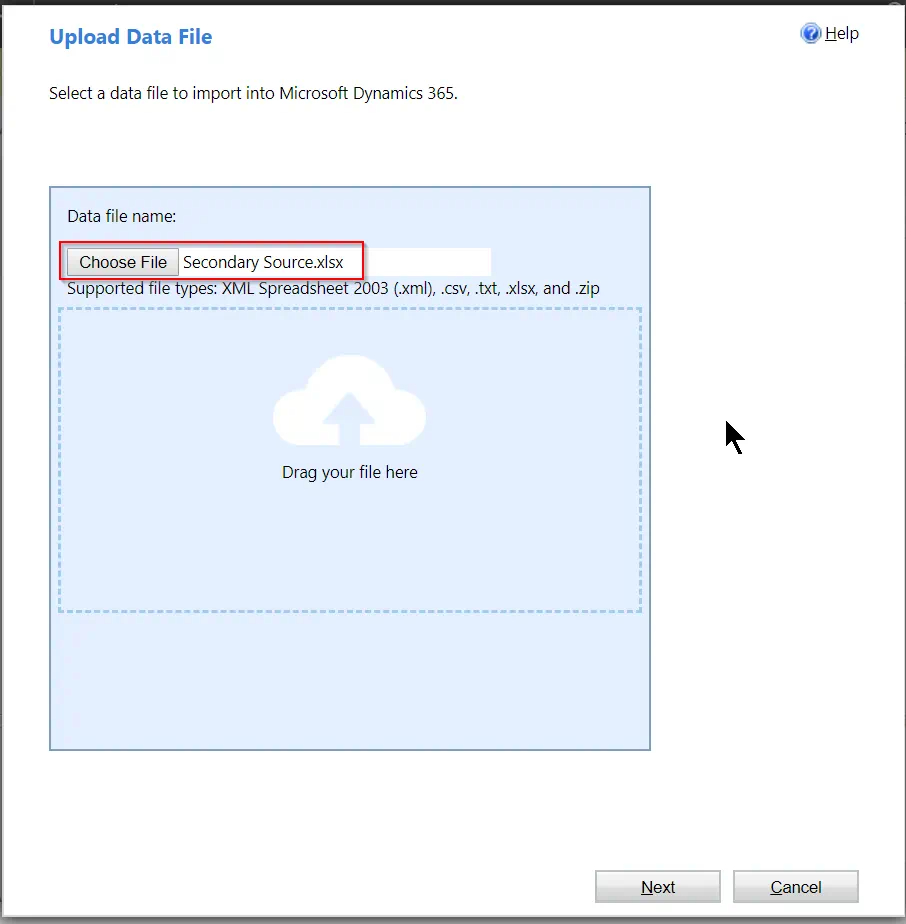
Step 15: Save the import spreadsheet where it is accessible to D365 and import the data. Go to Settings -> Extensions -> IMPORT DATA -> Import Data.
Select the file saved in #14 and click Next:
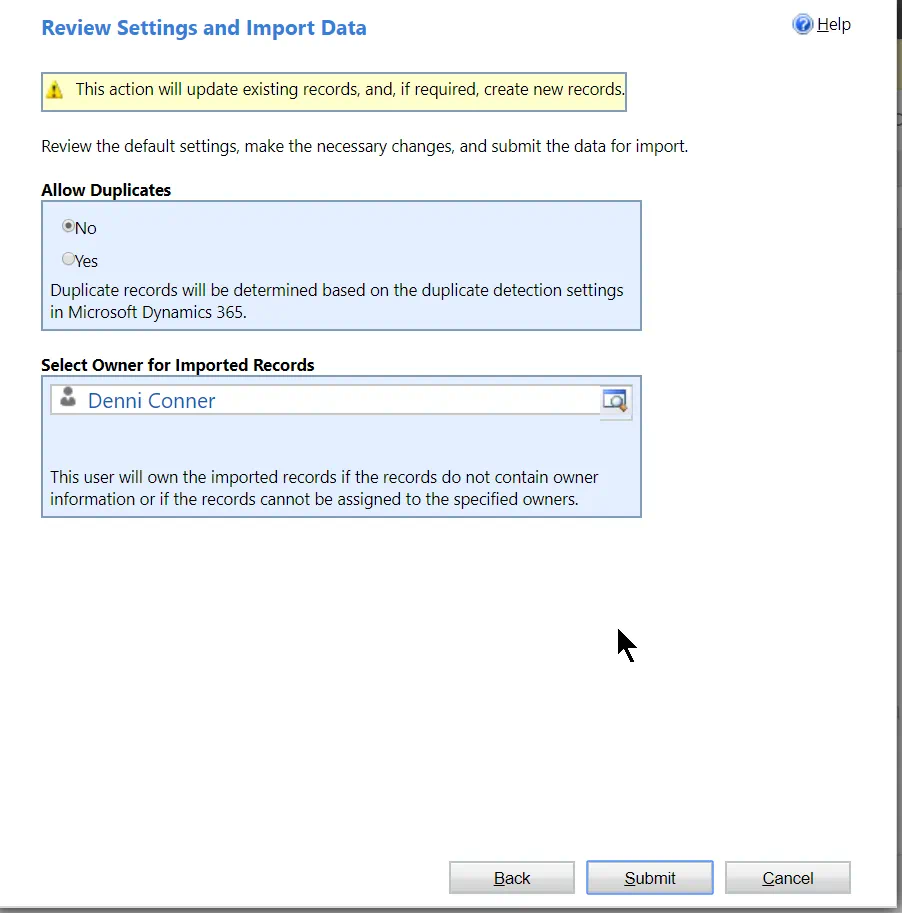
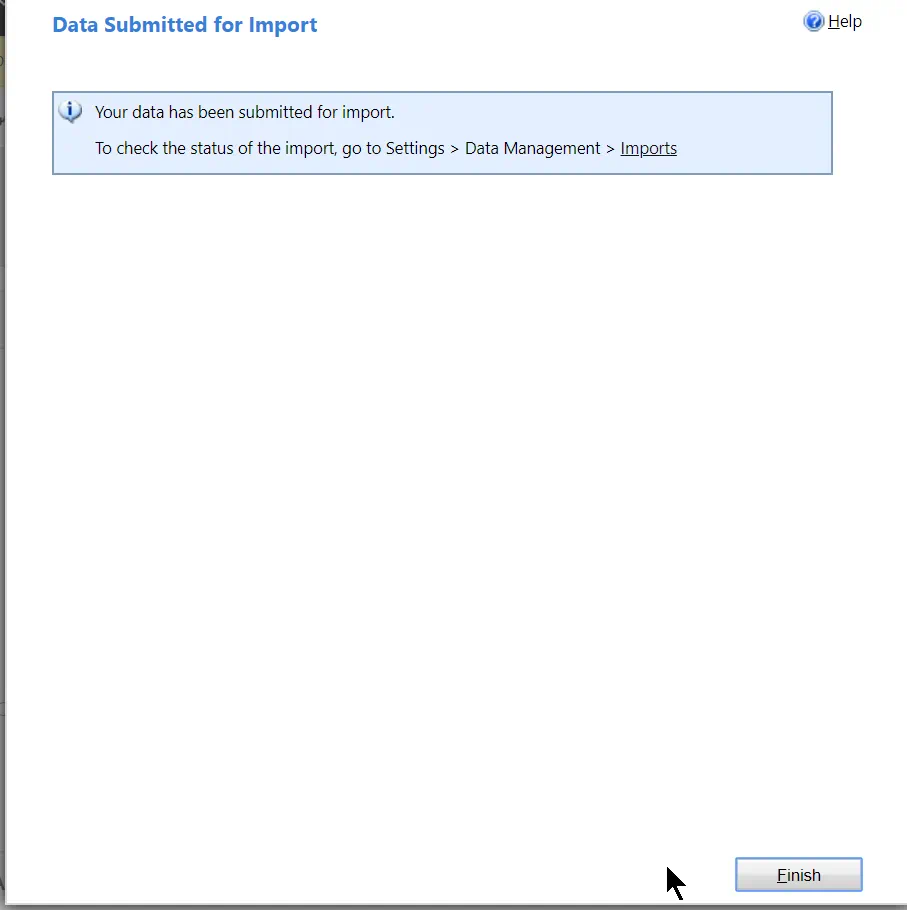
Click ‘Submit’:
And then ‘Finish’:
Step 16: After the data has finished importing (check it at Settings -> Data Management -> Imports), the Active Secondary Sources view should show the imported values:
Step 17: Go to the Leads form and create a new record to test that the Primary Source and Secondary Source fields are functional by choosing a value in the Primary Source and validating that only the Secondary Source values are available that are related to that Primary :