
How to Cancel the Closed Work through Location Directives in Dynamics 365 for Finance and Operations’ Advanced Warehouse Management


This blog explains how to cancel the “closed” work in Dynamics 365 for Finance and Operations. As currently, there is no way to cancel the closed work directly from the all work and In Dynamics 365 for Finance and Operations, the system doesn’t allow you to cancel the “closed” work from the “all” work.
There are many questions that arise from users, as there are scenarios where the user has picked the items from the fixed location and closed the work. At some point of time, the user has realized that the item which was picked from the fixed location wasn’t the item that was supposed to be picked. From that location, the user wants to reverse the work so that the inventory should be moved from the put location to the correct pick location, and work should be cancelled automatically so that the correct item can be picked again for shipping.
Dynamics 365 for Finance and Operations provides better flexibility to reverse the work via a load through four different options. In this blog, I will explain how to reverse the closed work through location directives.
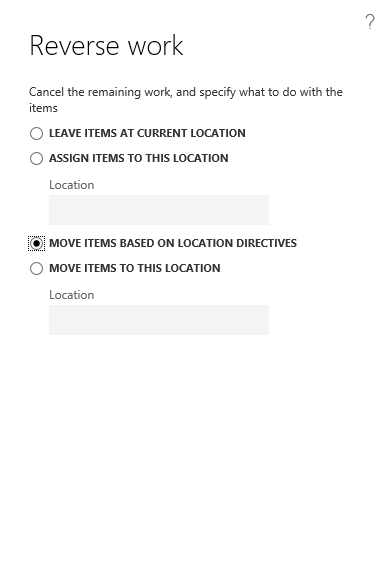
Closed works can be cancelled from the load (reverse work). On work cancellation, inventory will be moved to a different location based on a work template (last two options as shown below), or will be in the same location based on the option we select during work reversal.
There is an option which I am talking about called “Move items based on location directives”. During the work reversal, inventory movement work will be created so that user can complete the inventory transfer process, and the references of the picked items will be deleted from sales order. Cancelled work will still show the detailed transactions for historical/troubleshooting purposes.
Prior to performing the work reversal process, we should configure the work template and location directive so that during reversal, the item will automatically reverse to the desired locations.
Configure Location directives
1. Navigate to Warehouse management > Setup > Location directives.
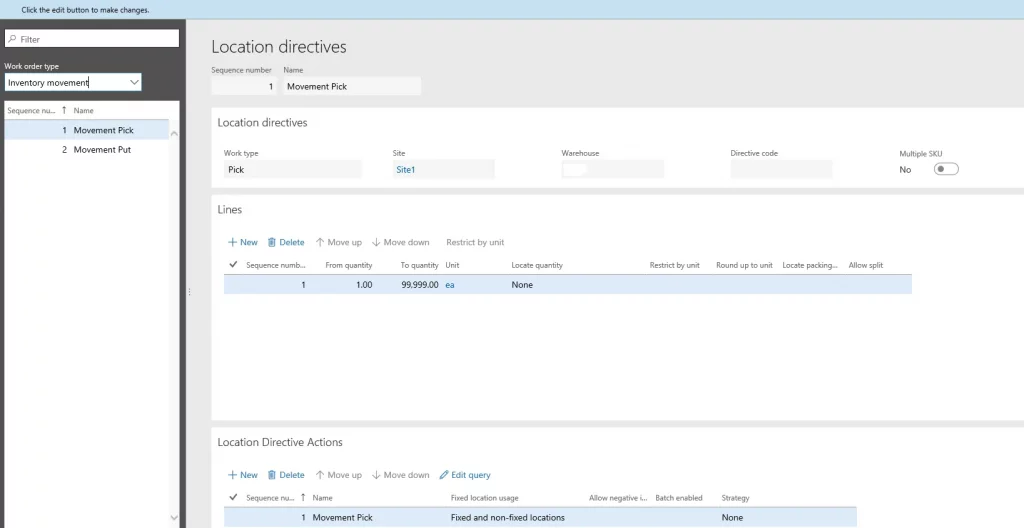
2. In the location directives, select the work order type = Inventory movement
3. Click New, to create the new inventory movement location directives for picking.
4. Select work type = Pick, Choose Site and Warehouse.
5. In the Lines section, click new and select from quantity and to quantity.
6. In the Location directive actions, provide the name and fixed location usage as “Fixed and non-fixed locations” (This should be your Outbound location where you want to transfer your inventory to fixed location).
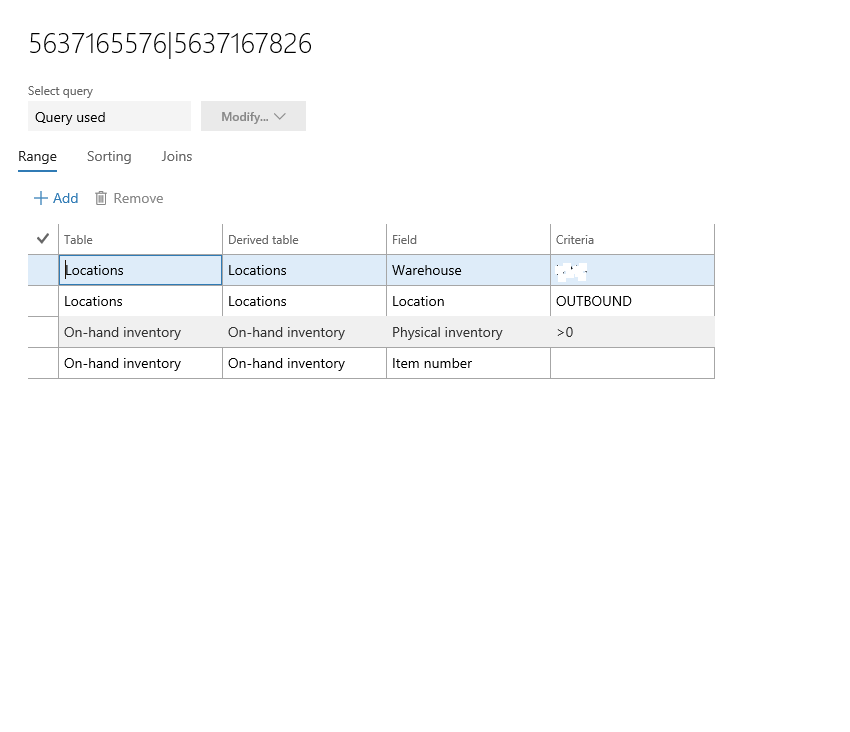
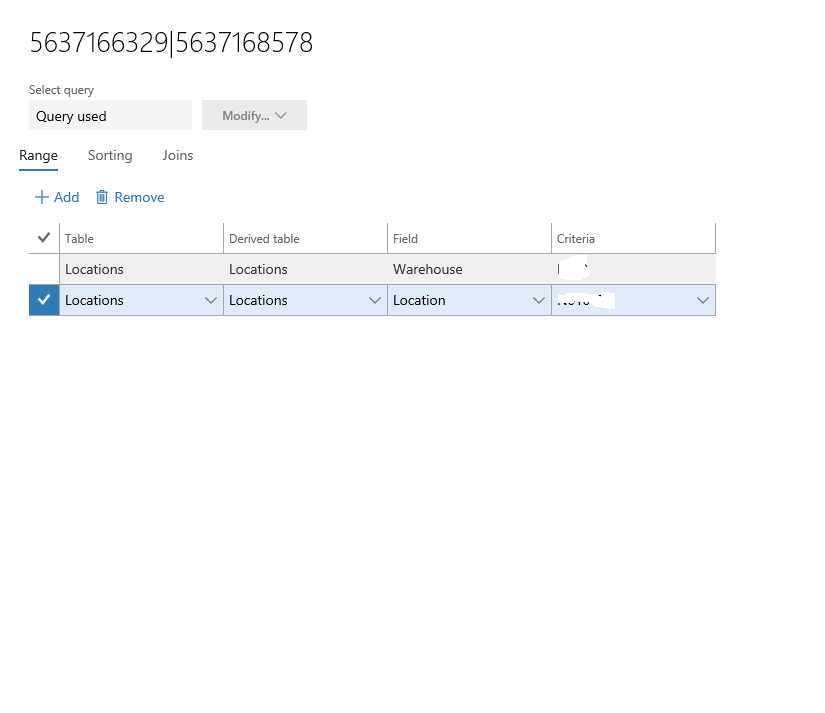
7. Click the edit query in the location directive actions. Select the desired warehouse and the location where you want to transfer the movement.
8. Follow the same steps to create the “Put” in the Inventory movement work order type. Click New, to create the new inventory movement location directives for Put.
9. Select work type = Put, Choose Site and Warehouse.
10. In the Lines section, click new and select from quantity and to quantity.
11. In the Location directive actions, provide the name and fixed location usage as “Only fixed location for the product” (This should be the fixed locations where you want to get your inventory back after work reversal).
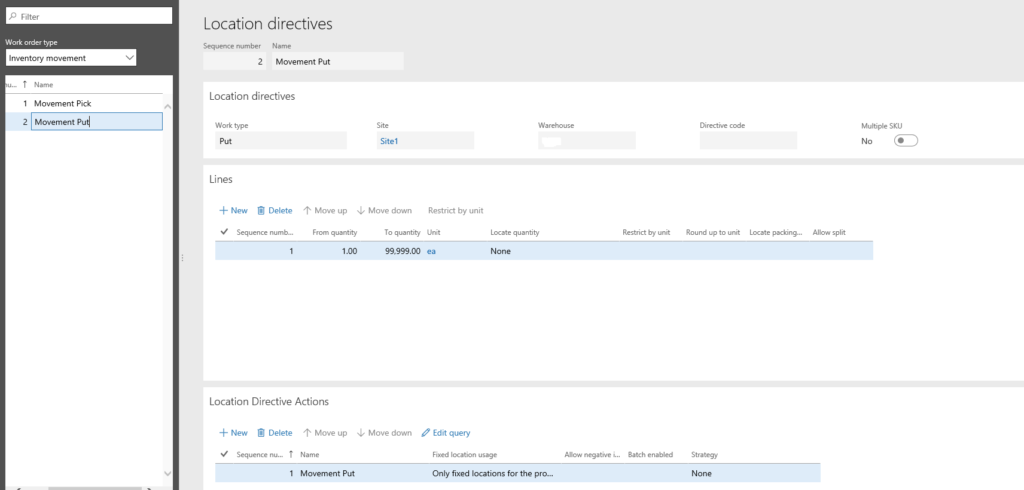
12. Click the edit query in the location directive actions. Select the desired warehouse and the fixed location where you want to get your inventory back.
13. Once location directive setup is complete, follow the below steps to setup a work template so that inventory work will be created. Navigate to Warehouse management > Setup > Work > Work template
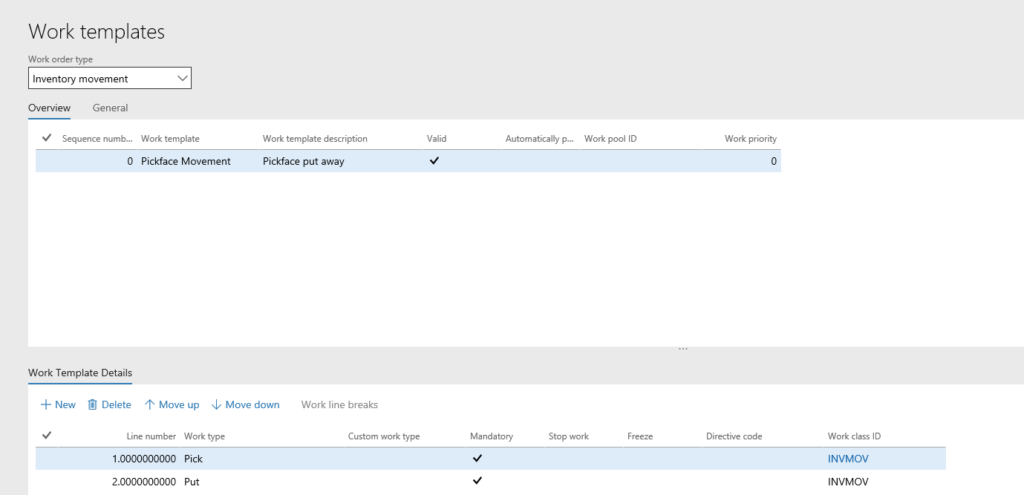
14. Select the work order type = Inventory movement. Click new to create the work template as shown above.
15. In the work template details section, click work type as pick and put and select the work class ID.
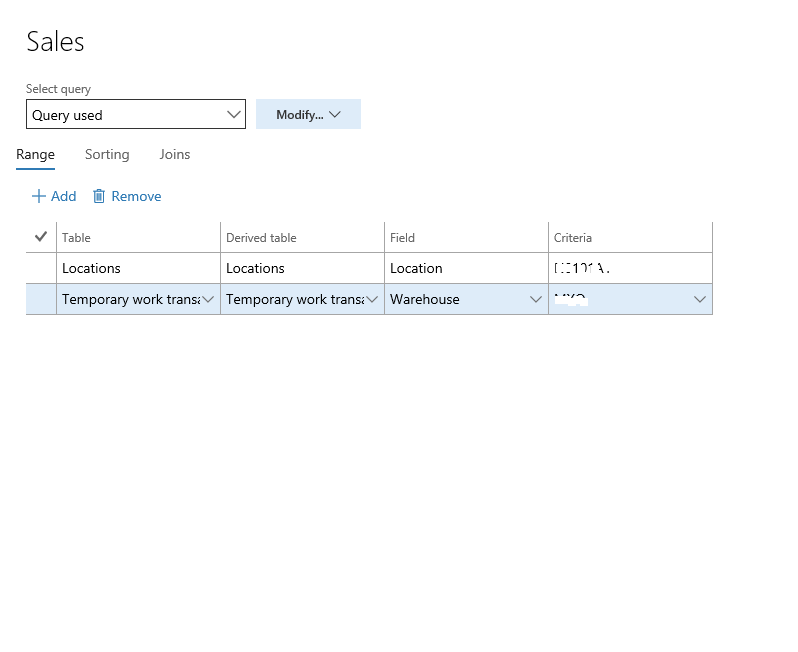
16. In the edit query section, provide the locations and warehouse (The fixed location details where you want the inventory to be back)
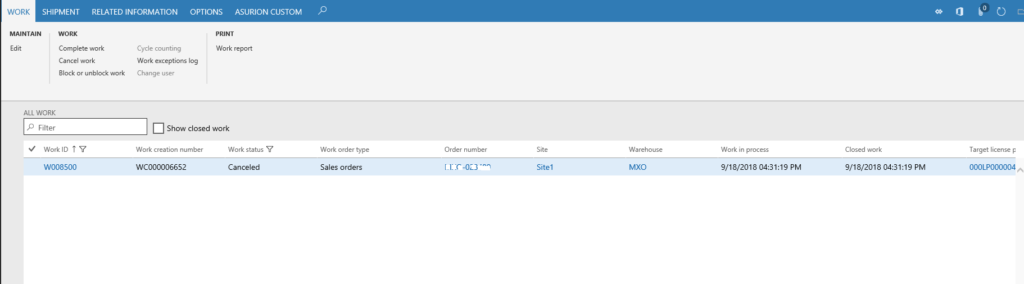
17. Once the above setups are completed, go to Warehouse management > Work > All work.
18. Select the work which is in “closed” status.
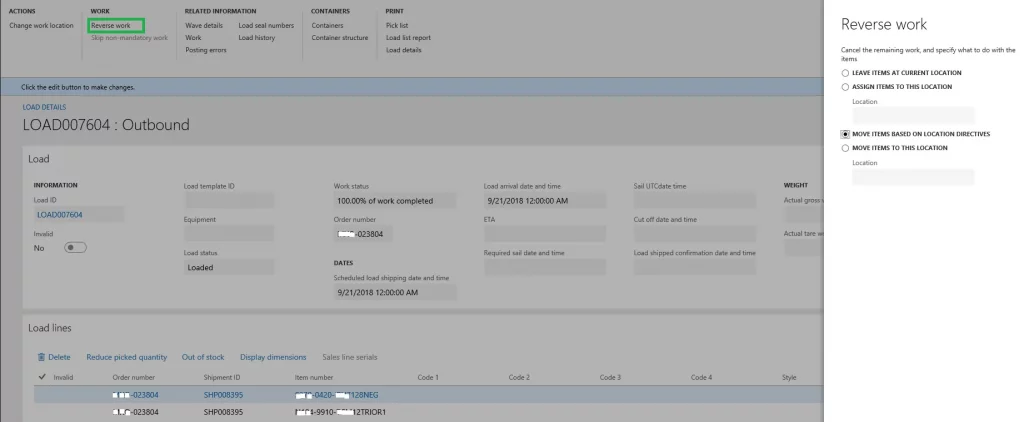
19. Select the load.

20. In the Load details form, click “reverse work” and select “Move items based on location directives”
21. Click Ok.
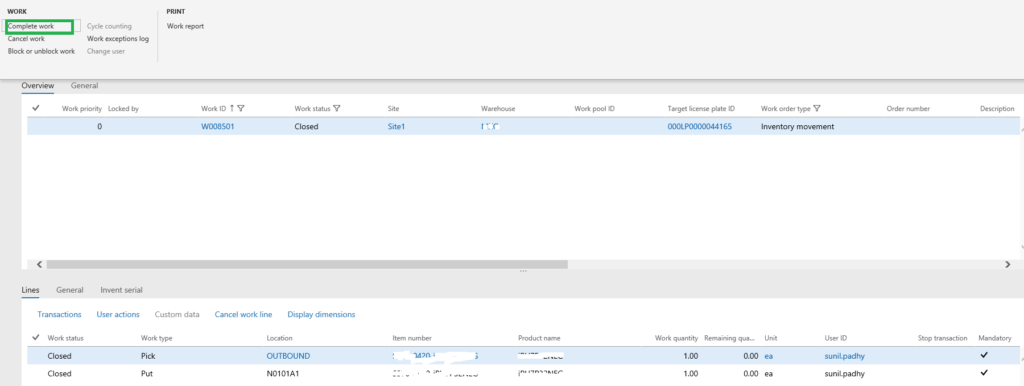
22. Now you would see:
The work will be cancelled automatically.
The new inventory movement work will be created and will be in Open status which can be closed after successful transfer of the item physically.
23. Complete the work so that work will be closed, and the inventory will be moved back from “Outbound” to the fixed location.
In these above ways we can successfully move the inventory through location directives for closed work. If you have any questions on this above process, please please contact us today.